
Simple Minimalist Makeup Routine for a Fresh, Natural Look
Do you feel overwhelmed every morning standing in front of your makeup collection? Too many products, too many steps, and still the result is not what you wanted. You spend 30 to 40 minutes getting ready and still feel like something is off. Maybe your makeup looks too heavy, too cakey, or just not natural. This is one of the most common problems women face every single day.
The solution is simple — a minimalist makeup routine step by step is all you need. It cuts down your getting-ready time, reduces the products you use, and gives you a clean, fresh, and natural look that actually lasts. Whether you are a beginner or just tired of complicated routines, this guide will walk you through everything — from the right products to each step in the correct order.
What Is a Minimalist Makeup Routine?
A lot of people confuse minimalist makeup with wearing no makeup at all. That is not what it means. A minimalist makeup routine is about using only the essential products that truly enhance your natural features — nothing more, nothing less.
The core idea is “less is more.” Instead of applying 10 to 15 products every morning, you choose 5 to 6 high-quality items that do the real job. Each product has a clear purpose. Nothing is extra. Nothing is wasted.
This approach works best for:
- Beginners who feel lost with too many makeup options
- Busy women who need a quick but polished look
- Skin-first lovers who want their skin to breathe
- Anyone who wants a natural, effortless appearance daily
One important thing to understand — a minimalist makeup look is different from a no-makeup look. A no-makeup look tries to make it seem like you are wearing nothing. A minimalist routine gives you a clean, put-together appearance with just the right amount of product. It enhances — it does not cover.

Why Should You Switch to a Minimalist Makeup Routine?
If you are still not sure whether minimalist makeup is right for you, here are some very real and practical reasons to make the switch. These benefits go beyond just saving time — they affect your skin, your wallet, and your overall confidence.
It Saves You a Lot of Time
A full glam routine can take 45 minutes or more. A simple minimalist makeup routine takes 10 minutes or less. When you only have 5 to 6 products to work with, there is no confusion. You know exactly what to pick up and what to do. Your mornings become calmer and more organized.
It Is Much Better for Your Skin
Every product you put on your face is a potential risk — clogged pores, breakouts, irritation, or allergic reactions. When you reduce the number of products, you automatically reduce that risk. Your skin gets to breathe. Fewer layers mean less buildup throughout the day. Over time, your skin actually starts looking healthier and clearer.
It Saves You Real Money
Full makeup collections can cost hundreds of dollars. A minimalist kit needs only 5 to 6 products — but good quality ones. You spend less overall and get more value from every single item. You also avoid buying products you use once and forget.
It Looks Natural and Timeless
Heavy makeup trends come and go. But a clean, natural, minimalist makeup look never goes out of style. It works for office, casual outings, errands, and even light social events. It enhances your real features instead of covering them — and that always looks better in photos and real life.

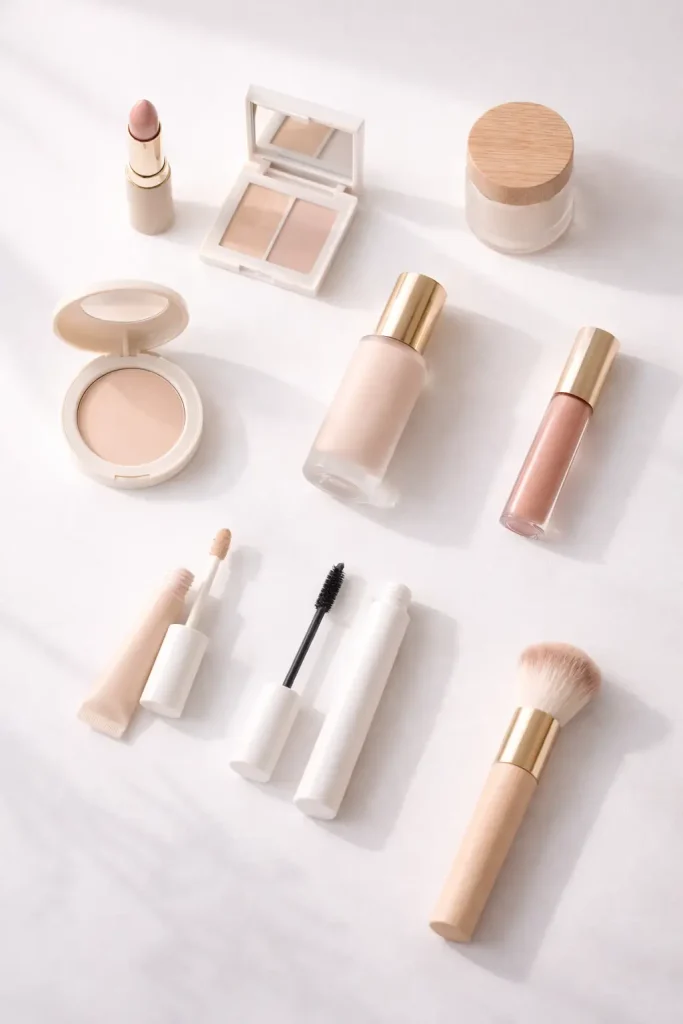
Products You Actually Need for a Minimalist Makeup Routine
You do not need a full vanity to look good. You just need the right 5 to 6 products — each one doing its job properly. Here is exactly what belongs in a minimalist makeup kit.
The Essential Minimalist Makeup Kit
| Product | Purpose |
|---|---|
| Tinted Moisturizer or BB Cream | Evens skin tone + adds hydration |
| Concealer | Covers spots and dark circles only |
| Brow Gel or Pencil | Frames and defines the face |
| Mascara | Opens up eyes naturally |
| Cream Blush | Adds warmth and healthy color |
| Tinted Lip Balm | Hydrates lips and adds soft color |
Each of these products is chosen for a reason. They are multi-functional, easy to apply, and beginner-friendly. You do not need a brush for most of them — fingers work perfectly.
One optional addition is a light setting spray. It locks everything in place and gives a natural dewy finish. It is not mandatory but very helpful in warm or humid weather. If you also want to improve your skin naturally, check out these Natural Glowing Skin Tips at Home in 2026 that work perfectly alongside your minimalist makeup routine.

Minimalist Makeup Routine Step by Step — Complete Beginner Guide
Now let us get into the most important part. This is the actual minimalist makeup routine step by step that you can follow every single morning. These steps are arranged in the correct order — so your makeup goes on smoothly and lasts longer throughout the day.
You do not need any special skills. You do not need expensive brushes. Just follow each step carefully and you will see the difference from day one.
Step 1 — Always Prep Your Skin First
The biggest mistake most beginners make is jumping straight into makeup without preparing their skin. Skin prep is the foundation of any good minimalist makeup routine. If your skin is dry, flaky, or oily — your makeup will not sit well no matter how good your products are.
Here is what you need for skin prep:
- Cleanser — wash your face gently to remove dirt and oil
- Moisturizer — hydrate your skin so makeup glides on smoothly
- Sunscreen SPF 30+ — protect your skin and create a smooth base
Apply your moisturizer and let it absorb for 2 to 3 minutes before moving to the next step. This small wait makes a big difference. Your skin will look plump, smooth, and ready for makeup.

Step 2 — Apply Tinted Moisturizer or BB Cream
Once your skin is prepped and your moisturizer has fully absorbed, it is time for the first actual makeup step. In a minimalist makeup routine, tinted moisturizer or BB cream replaces heavy foundation completely. It is lighter, faster to apply, and looks far more natural on the skin.
Here is how to apply it correctly:
- Take a small amount — one pump or a pea-sized amount is enough to start
- Warm it between your fingers — this helps it blend more naturally
- Press and blend outward — start from the center of your face and blend toward your hairline and jaw
- Build only where needed — do not apply an even layer everywhere, add a little more on redness or uneven areas only
The goal is not full coverage. The goal is an even, natural-looking skin tone. Your real skin should still show through slightly. That is what makes it look fresh and not cakey.
Quick Tips:
- Choose a shade that matches your neck — not just your face
- For dry skin — pick a hydrating BB cream with hyaluronic acid
- For oily skin — go for an oil-free or matte finish tinted moisturizer
- Fingers give the most natural finish — no brush or sponge needed
This one product alone evens out your skin tone, adds light hydration, and gives you a healthy glow — all in under 2 minutes.

Step 3 — Conceal Only Where You Actually Need It
This step is where most people go wrong. They apply concealer all over their face like a second layer of foundation. In a minimalist makeup routine, concealer is used only on specific spots — nothing more.
The areas where concealer actually helps:
- Under eyes — to brighten dark circles
- Redness around nose — to neutralize skin tone
- Spots or blemishes — to cover only that exact area
- Any uneven patches — that your BB cream did not fully cover
Here is how to apply it correctly:
- Take a tiny amount — less than you think you need
- Dot it directly on the area — do not swipe it on
- Pat gently with your finger — tapping motion blends it perfectly
- Do not rub — rubbing removes your BB cream underneath and creates patchiness
For under eyes specifically:
- Apply in a small triangle shape under each eye
- Pat from inner corner outward
- Blend the edges so there is no harsh line
- Let it sit for 30 seconds before moving on
Quick Tips:
- Use a concealer that matches your exact skin tone — not lighter
- If you want to brighten under eyes — go just one shade lighter maximum
- Cream concealers work better for dry skin
- Liquid concealers work better for oily skin
Remember — the less concealer you use, the more natural it looks. Your goal is to spot correct, not to create a mask over your face.

Step 4 — Groom Your Brows for a Polished Look
You will be surprised how much a difference groomed brows make. Even with zero other makeup on, clean and defined brows make your whole face look put together. In a minimalist makeup routine step by step, brows are one of the most important steps — because they frame your entire face.
The good news is — you do not need to draw perfect brows. You just need to enhance what you already have.
Two options for minimalist brows:
Option 1 — Brow Gel
- Best for people who already have full brows
- Simply brush through your brows in an upward motion
- Clear brow gel keeps them neat and natural looking
- Tinted brow gel adds a little color and definition
Option 2 — Brow Pencil
- Best for sparse or light brows
- Use light and short strokes — never draw one harsh line
- Follow your natural brow shape always
- Do not go too dark — match your natural brow hair color
Here is the correct technique:
- Start from the middle of your brow — not the inner corner
- Use feather light strokes — mimicking real hair
- Fill sparse areas only — do not color the entire brow
- Brush through after filling — this softens everything and blends strokes naturally
- Clean any mistakes with a cotton swab
Quick Tips:
- Never skip brows in a minimalist routine — they do most of the heavy lifting
- Soap brows are a great free alternative — just a clean spoolie and clear soap
- Over filled brows look unnatural — always go lighter than you think
- Your two brows are sisters not twins — they do not need to be identical
Well groomed brows instantly make you look more awake, more polished, and more confident — without any other product on your face. Discover effortless and stylish low-maintenance hair color ideas perfect for busy women who want to look great without constant upkeep.

Step 5 — Apply Mascara to Open Up Your Eyes
Mascara is probably the most powerful product in a minimalist makeup routine. Just one or two coats on your lashes can make your eyes look bigger, brighter, and more awake — without any eyeshadow or eyeliner needed. It is the one product that delivers maximum impact with minimum effort.
Here is how to apply it correctly:
- Start at the root of your lashes — place the wand at the base and wiggle it slightly
- Pull the wand upward and outward — this lifts and separates lashes naturally
- Apply one coat first — let it dry for 30 seconds before adding a second coat
- Two coats maximum — more than that starts to look clumpy and heavy
For the most natural minimalist look:
- Focus mascara on your upper lashes only
- Skip lower lashes — applying mascara there can make eyes look smaller and creates smudging throughout the day
- Concentrate more product on the outer lashes — this creates a subtle lifting effect
- Wiggle the brush at the root before pulling up — this adds volume right where it matters
Choosing the right mascara:
- Black mascara — works for most skin tones and gives definition
- Brown mascara — looks softer and more natural especially for fair skin tones
- Lengthening formula — best for minimalist look as it separates lashes without clumping
- Volumizing formula — good if your lashes are naturally thin and sparse
Quick Tips:
- Do not pump the mascara wand in and out of the tube — it pushes air in and dries it faster
- If mascara smudges — let it dry completely then flick it off with a clean spoolie
- Replace your mascara every 3 months — old mascara carries bacteria
- A clean spoolie brush through lashes after application removes clumps perfectly
One thing to remember — in a minimalist routine, mascara should enhance your lashes not transform them. The goal is defined, separated, and lifted lashes — not dramatic false lash effect. Keep it simple and natural.

Step 6 — Add Cream Blush for a Healthy Natural Flush
If there is one product that completely transforms a minimalist look — it is cream blush. It adds warmth, color, and life to your face instantly. Without blush, even the most perfect skin can look flat and dull. In a minimalist makeup routine step by step, cream blush is preferred over powder blush because it blends easily with fingers, looks more natural, and works beautifully on all skin types.
Here is how to apply cream blush correctly:
- Smile gently — this brings out the apples of your cheeks naturally
- Take a small amount on your finger — a pea sized amount is more than enough
- Dab it on the apple of your cheek — right on the roundest part
- Blend upward toward your temples — this lifts your face and looks most natural
- Blend the edges well — there should be no harsh lines or patches
- Build slowly — start light and add more only if needed
Where exactly to place blush for different looks:
- Apples of cheeks blending upward — most natural and everyday look
- Slightly higher on cheekbones — gives a more sculpted lifted appearance
- Lightly on nose bridge — adds a sun kissed fresh look popular in minimalist beauty
Best cream blush shades for minimalist routine:
- Peach — works beautifully on fair to medium skin tones
- Rose pink — universally flattering on almost all skin tones
- Coral — perfect for warm and olive skin tones
- Berry or mauve — stunning on medium to deep skin tones
- Terracotta — gorgeous on dark and deep skin tones for a natural warmth
Why cream blush works better than powder blush in a minimalist routine:
- No brush needed — fingers blend it perfectly
- Melts into skin for a natural second skin finish
- Does not disturb your BB cream underneath
- Gives a dewy healthy glow instead of a flat matte finish
- Lasts longer on skin when blended properly with fingers
Quick Tips:
- Less is always more with blush — you can always add but you cannot easily remove
- Tap and blend — never swipe or drag across your cheek
- Cream blush also doubles as a lip color in a pinch — true minimalist multi use product
- If you over apply — blend quickly with a clean finger using circular motions to soften
- Store cream blush away from heat — it can melt and change texture in warm environments
Cream blush is truly the heart of a minimalist makeup look. It brings everything together — your skin looks healthy, your features look defined, and your whole face looks fresh and alive. Do not skip this step.

Step 7 — Finish With a Tinted Lip Balm for Soft Natural Color
This is the final and most effortless step of your minimalist makeup routine step by step. A tinted lip balm ties your whole look together. It adds a soft wash of color to your lips while keeping them hydrated and comfortable throughout the day. No liner needed. No precise application needed. Just swipe and go.
In a minimalist routine, tinted lip balm is chosen over lipstick or lip gloss for very good reasons:
- It hydrates while it colors — two jobs in one product
- It looks natural and soft — never overdone or heavy
- It is beginner friendly — no skill or precision required
- It feels comfortable on lips all day long
- It fits perfectly into the less is more philosophy
Here is how to apply it correctly:
- Apply directly from the tube — swipe across your upper lip then lower lip
- Press lips together gently — this distributes color evenly
- No lip liner needed — the soft color does not require sharp edges
- Reapply as needed — tinted balms are light so they fade naturally after eating or drinking
Best tinted lip balm shades for a minimalist look:
- MLBB shades — my lips but better tones are the most popular minimalist choice
- Sheer pink — fresh and feminine, works on fair to medium skin tones
- Peachy nude — warm and natural, flattering on medium to olive skin tones
- Berry tint — beautiful and effortless on medium to deep skin tones
- Warm brown tint — rich and natural looking on deep and dark skin tones
- Coral tint — bright and summery, works across multiple skin tones
What to look for when choosing a tinted lip balm:
- Moisturizing ingredients — look for shea butter, vitamin E, or hyaluronic acid
- Sheer to medium coverage — avoid anything too pigmented as it defeats the minimalist purpose
- SPF protection — some tinted balms include sun protection which is a bonus
- Non sticky formula — it should feel light and comfortable not heavy or tacky
Quick Tips:
- Tinted lip balm also works as a subtle cheek tint if needed — true multi use minimalist product
- Apply on slightly exfoliated lips for the smoothest most even color
- If you want a little more color — layer two coats for slightly deeper pigmentation
- Choose a shade close to your natural lip color for the most effortless everyday look
- Keep one in your bag for quick touch ups throughout the day — it takes two seconds
A tinted lip balm completes your minimalist look perfectly. Your lips look naturally flushed, healthy, and cared for — without any effort or precision. It is the perfect last step for a routine built around simplicity and natural beauty.

Step 8 — Optional: Set Everything With a Light Setting Spray
This last optional step takes only five seconds but makes a real difference — especially if you live in a warm or humid climate. A light setting spray locks your minimalist makeup routine in place and adds a beautiful natural dewy finish to your skin.
Here is how to use it:
- Hold the bottle 20 to 25 cm away from your face
- Close your eyes and mist in a T and X pattern across your face
- Let it dry naturally — do not rub or touch your face after spraying
- One to two sprays maximum — you want a light mist not a wet face
What setting spray does for your minimalist look:
- Locks all products in place so they last longer
- Melts everything together for a more natural skin like finish
- Adds a healthy dewy glow to your skin
- Prevents your BB cream or concealer from looking patchy later in the day
- Keeps cream blush and tinted lip balm fresh for longer
Quick Tips:
- Choose a hydrating setting spray for dry skin — look for glycerin or aloe vera
- Choose a mattifying setting spray for oily skin — look for oil control formulas
- Setting spray is not the same as fixing spray — fixing spray is heavier and more suitable for full glam
- You can also use it before makeup as a primer spray to prep your skin
- A small travel size bottle fits easily in your bag for midday refreshing
This optional step completes your entire minimalist makeup routine step by step perfectly. Your makeup is now set, fresh, and ready to last through your whole day.

Minimalist Makeup Tips for Different Skin Types
One of the best things about a minimalist makeup routine is that it works for every skin type. You just need to make small adjustments based on what your skin needs. Here is a complete breakdown for each skin type so you can get the best results every single time.
Minimalist Makeup Routine for Oily Skin
Oily skin can make makeup slide off, look shiny, or break down within a few hours. But with the right product choices your minimalist makeup routine can last all day even on oily skin.
Here is what to do:
- Choose an oil free BB cream or tinted moisturizer — avoid anything with added oils or heavy hydrating ingredients
- Use a lightweight liquid concealer — cream concealers tend to slide on oily skin
- Skip heavy cream products where possible — opt for lighter gel based formulas instead
- Set with a very light dusting of translucent powder — focus on T zone only — forehead, nose, and chin
- Use a mattifying setting spray — this is the most important step for oily skin in a minimalist routine
- Blotting papers are your best friend — keep them in your bag for midday touch ups instead of adding more product
Best product textures for oily skin:
- Gel based or water based formulas
- Oil free and non comedogenic labeled products
- Lightweight liquid concealers
- Powder or gel brow products instead of waxy pencils
Quick Tips:
- Do not skip moisturizer thinking it will reduce oil — dry skin actually produces more oil to compensate
- Look for keywords like oil free, mattifying, and pore minimizing on product labels
- Avoid anything labeled dewy or luminous — these will make oily skin look greasy not glowy

Minimalist Makeup Routine for Dry Skin
Dry skin needs extra hydration at every step. The wrong products can make dry skin look flaky, patchy, and uncomfortable. The right minimalist choices will make your skin look plump, dewy, and healthy all day.
Here is what to do:
- Choose a hydrating tinted moisturizer — look for ingredients like hyaluronic acid, glycerin, or squalane
- Use a cream concealer — it blends more smoothly and does not emphasize dry patches
- Stick to cream blush always — powder blush will cling to dry patches and look uneven
- Choose a rich tinted lip balm — dry skin shows on lips too so extra hydration is important
- Avoid all powder products — powder emphasizes dryness and makes skin look older and dull
- Add a face oil under your BB cream — one drop mixed in or applied before gives an extra glow
Best product textures for dry skin:
- Cream and balm formulas throughout
- Hydrating and dewy finish products
- Oil infused or moisture rich formulas
- Avoid anything labeled matte or oil free
Quick Tips:
- Always apply makeup on freshly moisturized skin — never on dry or tight feeling skin
- Use a hydrating setting spray instead of powder to set your look
- Look for keywords like hydrating, dewy, moisture rich, and skin quenching on labels
- Drink enough water daily — internal hydration shows on your skin more than any product

Minimalist Makeup Routine for Sensitive Skin
Sensitive skin reacts easily to new products — redness, irritation, breakouts, or allergic reactions can happen quickly. In a minimalist makeup routine sensitive skin actually has a natural advantage — fewer products means fewer chances of a reaction.
Here is what to do:
- Always choose fragrance free products — fragrance is the number one cause of skin reactions
- Look for non comedogenic labels — these products will not clog your pores or cause breakouts
- Patch test every new product — apply a small amount on your inner arm or jaw for 24 hours before full use
- Choose mineral based makeup where possible — mineral formulas are naturally gentle and non irritating
- Introduce one new product at a time — never add multiple new products together so you can identify what causes a reaction
- Keep your routine as simple as possible — every extra product is an extra risk for sensitive skin
Best product choices for sensitive skin:
- Mineral tinted moisturizers or BB creams
- Fragrance free and hypoallergenic concealers
- Gentle cream blushes with simple ingredient lists
- Soothing tinted lip balms with aloe or chamomile
Quick Tips:
- Read ingredient lists carefully — avoid alcohol, synthetic fragrance, and harsh preservatives
- Less products always means less risk — minimalist routine is genuinely the safest approach for sensitive skin
- If redness is a concern — look for products with green tinted bases to neutralize before applying BB cream
- Consult a dermatologist if reactions keep happening — some skin conditions need medical attention not just product changes

Minimalist Makeup Routine for Dark Skin Tones
Finding the right products for deeper skin tones has historically been a challenge. But the beauty industry has improved significantly and there are now excellent options for every shade. Here is how to make your minimalist makeup routine work beautifully on dark and deep skin tones.
Here is what to do:
- Choose BB creams and tinted moisturizers with warm or golden undertones — avoid anything with pink or neutral undertones as they can look ashy
- Watch out for white cast — always check if a product leaves a white cast especially SPF products and BB creams
- Use a concealer that truly matches — do not go too light under eyes as it creates an unnatural contrast
- Choose cream blush in deeper and richer shades — berry, burnt orange, terracotta, and deep rose work beautifully
- Pick tinted lip balms in warm brown, brick red, or deep berry tones — these complement deeper skin tones naturally
- Look for brands that specifically cater to deeper skin tones — they formulate products with the right pigmentation and undertones
Best shades for dark skin tones in a minimalist routine:
- Blush — terracotta, deep coral, berry, warm brick
- Lip — warm brown, deep rose, brick red, plum tint
- BB cream — always warm or golden undertones never pink or cool
Quick Tips:
- Natural sunlight is the best way to check if a product matches your skin — store lighting can be misleading
- Do not let limited shade ranges stop you — many brands now offer 40 plus shades
- Skincare is even more important for deeper skin tones — healthy glowing skin makes minimalist makeup look stunning
- Embrace your natural skin texture and tone — minimalist makeup is about enhancing not covering

Common Minimalist Makeup Mistakes to Avoid
Even with a simple routine, there are some very easy mistakes that can ruin your entire look. These are the most common ones people make when starting a minimalist makeup routine step by step. Knowing these mistakes in advance will save you a lot of time, money, and frustration.
Mistake 1 — Using Too Many Products
This is the most common mistake. People say they want a minimalist routine but then keep adding “just one more product.” The moment you cross 6 to 7 products you are no longer doing minimalist makeup. You are just doing a lighter version of a full glam routine.
How to fix it:
- Stick strictly to your 5 to 6 essential products
- Remove anything from your routine that does not have a clear and specific purpose
- Ask yourself before adding any product — do I actually need this or do I just want it
- If two products do the same job — keep the better one and remove the other
Mistake 2 — Skipping Skin Prep
No matter how good your makeup products are — if your skin is not prepped properly your makeup will not look good. Dry patches will show. Oily areas will break down your BB cream. Uneven texture will make everything look patchy.
How to fix it:
- Never skip cleanser, moisturizer, and SPF before makeup
- Give your moisturizer at least 2 to 3 minutes to absorb before applying any makeup
- Exfoliate your skin 2 to 3 times a week to keep texture smooth
- Treat your skin well daily — good skin is the real foundation of minimalist makeup

Mistake 3 — Choosing the Wrong Shade
This single mistake can make even the most perfectly applied makeup look wrong. A BB cream that is too light looks ghostly. A concealer that is too dark looks muddy. A blush that does not suit your undertone looks out of place.
How to fix it:
- Always swatch products on your jawline — not your hand or wrist
- Check the shade match in natural sunlight — never under store lighting
- Match your BB cream to your neck as well as your face
- Choose concealer in your exact skin tone for spot coverage
- Go only one shade lighter maximum for under eye brightening
- Choose blush and lip shades that complement your skin undertone — warm undertones suit peach and coral, cool undertones suit rose and berry
Mistake 4 — Overdoing the Brows
Brows are the most important feature in a minimalist routine — but they are also the easiest to overdo. Heavy, dark, and sharply drawn brows completely destroy the natural effortless look you are going for.
How to fix it:
- Always use a shade that matches your natural brow hair — never go darker
- Use light feathery strokes — never draw a solid line
- Fill only sparse areas — do not color your entire brow
- Brush through after filling to soften and blend everything
- Step back from the mirror and check — if your brows are the first thing you notice your face your brows are too strong
Mistake 5 — Applying Too Much Product at Once
In a minimalist routine every product should be applied in thin layers. Applying too much BB cream, concealer, or blush in one go creates a heavy and unnatural look — the exact opposite of what you want.
How to fix it:
- Always start with less than you think you need
- Build up coverage slowly and gradually
- Remember you can always add more product but removing excess product disturbs everything underneath
- Use the patting and pressing technique instead of swiping — it gives more control over how much product goes on

Mistake 6 — Using Old or Expired Products
Many people hold onto makeup products for years thinking they are still fine to use. Expired makeup does not just perform badly — it can cause serious skin problems including breakouts, irritation, and eye infections.
How to fix it:
- Check the PAO symbol on every product — it looks like an open jar with a number inside like 6M or 12M meaning months of use after opening
- Replace mascara every 3 months without exception
- Replace cream products every 6 to 12 months
- If a product smells different, has changed texture, or has separated — throw it away immediately
- Keeping a small minimalist kit actually makes this easier — fewer products means you use each one faster and replace more regularly
Mistake 7 — Skipping Blush Entirely
A lot of beginners skip blush thinking it is an optional step. In a minimalist makeup routine blush is actually one of the most essential steps. Without it your face can look flat, tired, and unfinished — even with perfect skin prep and great BB cream.
How to fix it:
- Always include cream blush in your minimalist kit
- Keep the application light and natural
- Choose a shade close to the color your cheeks naturally flush when you are warm or after exercise
- Even the lightest wash of blush makes a huge difference to the overall freshness of your look
How to Build Your Minimalist Makeup Collection Over Time
Starting a minimalist makeup collection can feel confusing at first. You look at your current stash and wonder what to keep, what to throw away, and what to buy next. The good news is — building a proper minimalist makeup routine collection is actually very simple when you follow a clear plan. You do not need to buy everything at once. You just need to be smart and intentional about every single product you bring into your routine.
Start With the 5 Core Essentials First
Before anything else — get these 5 products right. Everything else comes later. These are the non negotiables of any minimalist makeup routine step by step:
- Tinted moisturizer or BB cream — your skin base
- Concealer — for spot correction only
- Brow gel or pencil — to frame your face
- Mascara — to open up your eyes
- Cream blush — to add life and warmth to your face
Once you have these 5 products and you are comfortable using them — then and only then should you think about adding anything else. Master the basics first. This is the most important rule of minimalist makeup collection building.
Add One New Product Every 2 to 3 Months
This is the golden rule of building a minimalist collection without going overboard. Every 2 to 3 months you can introduce one new product into your routine — but only if there is a genuine need for it.
Ask yourself these questions before buying anything new:
- Do I actually need this product or do I just want it because I saw it online
- Does this product solve a specific problem in my current routine
- Will this product replace something I already have or add a completely new step
- Can I afford to use this product regularly or will it just sit unused
If your answers are honest and the product genuinely adds value — go ahead and add it. If not — leave it. This slow and intentional approach keeps your collection small, useful, and truly minimalist.

Replace Empties Before Buying Something New
This is one of the most powerful habits you can build as a minimalist makeup user. When a product runs out — replace that exact product before buying anything new. Do not use an empty concealer as an excuse to buy three new products you have been eyeing.
This habit does two important things:
- It keeps your collection at a consistent small size — never growing out of control
- It forces you to evaluate whether you actually missed that product or not
If you finish a product and realize you did not miss it at all during the time it took to decide — that is a sign you do not need to replace it. Your collection just got one product smaller. That is a win in minimalist beauty.
Keep Your Total Kit to 8 to 10 Products Maximum
As your collection grows over time — set a firm limit of 8 to 10 products total in your active everyday kit. This number gives you enough variety to work with while keeping everything simple and manageable.
A well rounded minimalist kit of 8 to 10 products could look like this:
- Tinted moisturizer or BB cream
- Concealer
- Brow gel or pencil
- Mascara
- Cream blush
- Tinted lip balm
- Setting spray
- One multi use highlight or glow product
- One eye defining product if needed — brown liner or shadow
- A light face powder for oily skin only if necessary
That is a complete and fully functional everyday makeup kit. Nothing is missing. Nothing is wasted. Every product earns its place.
Always Choose Multi Use Products
One of the smartest strategies in building a minimalist makeup collection is choosing products that do more than one job. Multi use products cut down the number of items you need while giving you more versatility in your routine.
Here are the best multi use products for a minimalist kit:
- Cream blush that doubles as lip color — same product used on cheeks and lips
- Tinted lip balm used as cheek tint — a light swipe on cheeks works beautifully
- Tinted moisturizer with SPF — skincare and makeup in one step
- Brow gel that works as lash gel — clear brow gel can tame and set lashes too
- Concealer used as eye shadow base — a light pat of concealer on lids makes eye color pop and last longer
- Highlighter used on eyes lips and cheekbones — one product three different uses
When you shop with multi use functionality in mind — your collection stays small but your options stay flexible. This is the smartest way to shop as a minimalist.
Invest in Quality Over Quantity
This is perhaps the most important mindset shift in building a minimalist makeup collection. Buying 20 cheap products that perform poorly is not minimalist — it is just cluttered. True minimalist beauty means spending a little more on fewer but genuinely good products that perform well and last long.
Here is how to think about it:
- A good quality BB cream that lasts 8 hours is worth three times the price of a cheap one that fades in 2 hours
- A long lasting cream blush that stays fresh all day eliminates the need for touch up products
- Quality products also tend to be better for your skin — better ingredients, better formulations, less risk of irritation
Where to invest more:
- BB cream or tinted moisturizer — this is your base and affects everything
- Mascara — cheap mascaras clump, flake, and irritate eyes
- Concealer — poor quality concealers crease and look patchy quickly
Where you can save:
- Setting spray — many drugstore options work just as well as high end ones
- Brow gel — drugstore brow gels are often excellent quality
- Tinted lip balm — many affordable options perform beautifully
Do a Collection Edit Every 3 to 6 Months
Even with the best intentions — products can accumulate over time. Every 3 to 6 months sit down with your entire makeup collection and do an honest edit.
Ask these questions about every single product:
- Have I used this in the last 30 days
- Does this product still perform well
- Is this product expired or close to expiry
- Does this product still fit my current skin needs and routine
- Am I keeping this out of guilt or because I genuinely use and love it
Be honest with your answers. Anything that does not pass this edit — remove it. Throw away expired products. Give away unused ones. Keep only what truly belongs in your active minimalist routine.
This regular editing habit keeps your collection intentional, fresh, and truly minimalist over the long term.

Final Thoughts — Less Really Is More
You have now learned everything you need to start a proper minimalist makeup routine step by step. From skin prep to setting spray — every step has been covered clearly. The truth is — you do not need a full vanity, expensive products, or an hour in front of the mirror to look good. You just need the right 5 to 6 products, a little practice, and the confidence to embrace your natural features.
Minimalist makeup is not about looking bare or undone. It is about looking like the best, most polished version of yourself — effortlessly and every single day. Start simple, build slowly, and trust the process. Your skin, your time, and your confidence will all thank you for it.


